
![]()
![]()
![]()
![]()
If you have never used Gmax/3dsmax or any other 3D modeling program then this area's for you. These tutorials will cover the basics of Gmax or are so simple (once you understand the process) that they can almost be explained by simply looking at the pictures. =)
I will start working on this diligently right after the Gmax contest is over. If you have not entered yet, then go here.
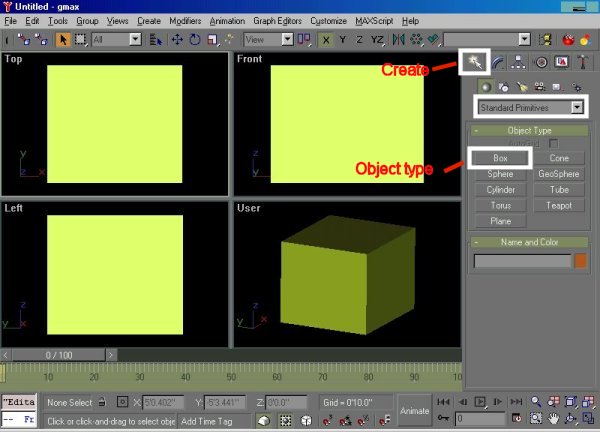 |
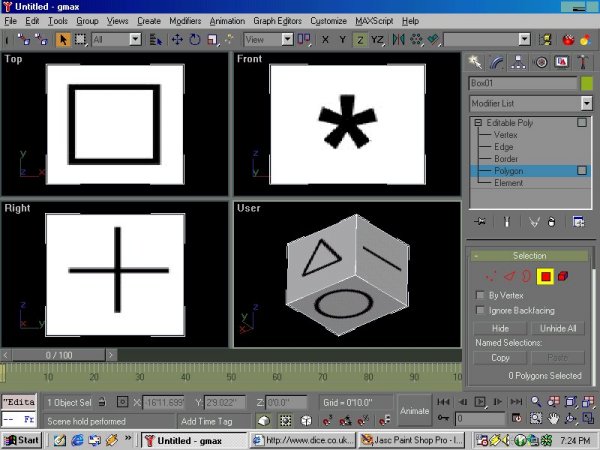
| In order to start skinning we need something
to skin. Make a box that's 6x6x6.
If you know how to make a box then go to the next step. To make a basic box click on the create button. The white arrow, then pick the box button. Draw your box any shape but before leaving the box, type 6 in the x, y and z settings. Then right click on the box and convert it into an editable poly. |
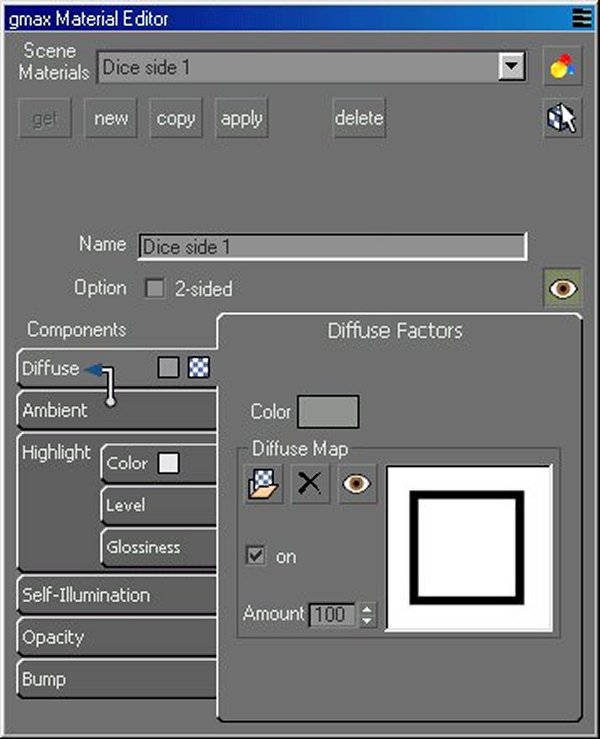 |
| Now we are ready too start applying textures
or skins. Of course first we have to have the skins. For
this example use any image editor and make 6 different skins to apply to
our dice. You can use any maps you have, for this example I made
some simple shape skins. Replace the name of the source map with the
name of your map.
Start with the first side and open the material editor. Load you map into it by pressing the browse button and browsing for your map. There are a few things to learn here. 1. for simple items you could be unspecific but for complex items you need to be as specific as possible. For example, I named my new material "dice side 1" . At first this may seem like I'm being too detailed, but it's a good habit to get into. When you have to remember what you named your material it will be easer to use "Dingo RFoot map" than "Fmap" 2. you can always update the map. In reality you will tweak your map several times before its to the point that you are happy with it. As long as you do not change the dimensions you can completely change the image. Create all 6 materials to be used. |
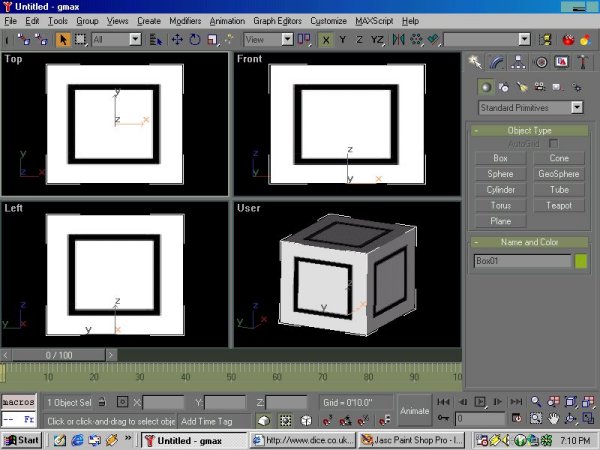 |
| While the box is selected pick the "apply" button from the material editor. The box will have your first material skinned on all its sides as shown above. This is because when you create a box it has a UV cube map automatically applied. Most new objects will not have a correct UV map, but we will get into that later. |
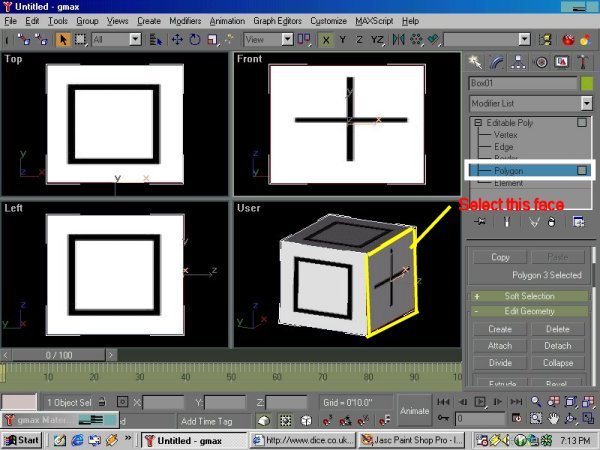 |
| Expand the modify list and select the polygon filter. Then select another side (polygon) of the box. From the material editor pick the second material an click on the apply button. The next material should appear as shown above. |
 |
| Repeat the process until all the sides are
textured. That's the basic premise of how skinning works. In
this case we did not apply UV maps but that is ok because what is
important here is to get an understanding of how to make materials and
apply them.
Next lesson, UVmaping. |